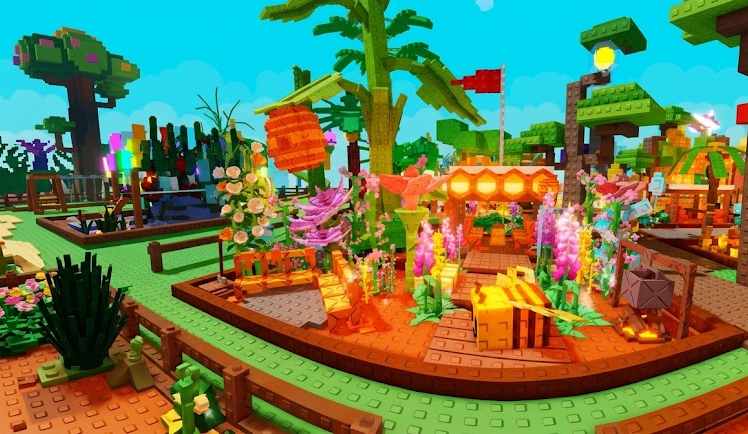
In Roblox Grow a Garden, having rare seeds and powerful pets is only part of building a successful garden. The way you arrange your crops, place your sprinklers, and use your pets can also affect your progress.
Some players want to earn more Sheckles, while others focus on growing heavier fruits, collecting event rewards, or leveling up their pets. Instead of using one setup for everything, you can build different sections of your garden to handle each task.
In this guide, we will cover useful garden layouts for different stages of the game, along with three specialized pet setups for events, weight boosts, and faster pet aging.
Best Garden Layouts in Grow a Garden
Your garden layout should match the resources and equipment you currently have. A simple arrangement works well when you are starting out, but a more organized garden becomes useful once you have better seeds and sprinklers.
1. Compact Layout for Beginners
If you are new to Grow a Garden, you do not need to fill every available space with expensive crops. Start with plants that grow quickly and can be harvested regularly.
Recommended crops:
- Bamboo
- Carrots
- Strawberries
Keep these crops close together and place a sprinkler where it can cover as many plants as possible. This makes it easier to manage your garden without spending too much on equipment.
The main advantage of this layout is its simplicity. You can harvest your crops, sell them, and replant without waiting too long for another growing cycle.
Use basic soil for inexpensive crops and save upgraded soil for seeds that offer better returns.
2. High-Density Layout for Mid-Game Players
Once you have collected more Sheckles and unlocked stronger equipment, you can move toward a layout built around valuable crops.
Mushrooms, Pumpkins, and Dragonfruit are examples of crops to consider when developing a higher-value farming area.
Arrange your best crops in compact groups rather than scattering them throughout the garden. Place your strongest sprinkler near the center and position other sprinklers around it to increase coverage.
This layout helps you concentrate growth effects on the crops that matter most.
You can also use a Trowel to reorganize your garden when you want to change the arrangement. Before moving everything, check which crops benefit most from your available equipment.
3. Mutation Farming Layout for Late Game
For experienced players, growing a valuable fruit is only one way to increase its selling price. Mutations can make certain fruits much more valuable, so it can be useful to dedicate part of your garden to mutation farming.
Choose a small area for your best crops and arrange the relevant equipment around them. Lightning Rods can be used as part of a strategy for obtaining the Shocked mutation, while suitable pets may help with other mutation opportunities.
The goal is to focus your resources on a smaller group of valuable crops rather than treating every garden space equally.
If you are trying to build up multiple mutations on a fruit, avoid harvesting it too early. Give it time to receive additional effects when the relevant weather conditions occur.
Keep in mind that mutation results depend on the game's mechanics and available effects, so this approach is not a guarantee of a particular outcome.
4. AFK Farming Layout
If you prefer spending less time actively managing your garden, you can create a compact area for passive farming.
Start by grouping your best mature crops together. Arrange your available sprinklers so their coverage overlaps the valuable plants as much as possible.
This approach is particularly useful when you have high-rarity crops that justify dedicating space and equipment to them.
Before leaving your garden unattended, consider using a private server if you want to reduce interference from other players. When you return, check your crops and collect the fruits that are ready to sell.
AFK farming works best when your garden is organized around valuable crops rather than filled with plants that offer little return.
Best Pet Setups in Grow a Garden
Garden layouts help you organize crops and equipment, but pets can support other goals. The following three combinations are based on the setups described in Duhbeast's video, 3 Useful Setups in Grow A Garden.
1. Whale Setup for Events and Player Support
The Whale setup is designed for players who want to help with events and make use of special weather effects.
The main strategy involves using a Whale that can eat very large fruits weighing around 50–62 kg. A Moon Cat helps prepare the fruits required for this setup.
Pets in this setup:
- Whale
- Moon Cat
- Giraffe
- Lure Bird
The Whale is the main part of the combination. According to the described strategy, its ability can trigger special weather that provides double XP and significantly reduces ability cooldowns.
The Giraffe adds Sheckles-related benefits, while the Lure Bird helps duplicate event harvests. Together, these pets support an account focused on event activities and player services.
Best use: Event farming, helping other players, and supporting activities that benefit from weather effects and cooldown reductions.
2. KG Boost Setup for Heavier Pets
The KG Boost setup focuses on increasing pet weight, especially when you have limited garden space.
Instead of spreading your pets across a large area, this combination brings them together so area-of-effect abilities can reach the group more efficiently.
Pets in this setup:
- 1 Lion
- 2 Albinos
- 3 GCPs
- 1 Rainbow Hatch Elephant
The Lion helps bring the pets together, allowing the other pets to apply their boosts to a more concentrated group.
This arrangement is useful because positioning matters when you are trying to maximize the reach of area-based abilities. Keeping the pets close together can help you get more value from the setup without needing a large garden.
Best use: Players who want to focus on weight gains and make efficient use of a smaller garden.
3. Level Boost Setup for Faster Pet Aging
If you are more interested in leveling up pets than earning Sheckles, the Level Boost setup offers a different approach.
This combination focuses on reducing cooldowns so aging-related abilities can be used more frequently.
Pets in this setup:
- 3 Peacocks
- 2 French Fry Ferrets
- 1 Spider
- 1 Hot Dog
The strategy described in the video involves combining Inferno and Transcendent mutations with the Whale's weather buffs. These effects work together to reduce cooldowns and help the relevant abilities activate more frequently.
The result is a setup designed to make pet aging less time-consuming. However, you will need the required pets and mutations to reproduce the combination, and the results depend on the abilities available in your game.
Best use: Players who want to prioritize pet progression and spend less time manually managing the aging process.
How to Combine Garden Layouts and Pet Setups
You do not necessarily need to choose between crop farming and pet progression. You can organize your garden into separate areas based on what you want to achieve.
Here is one practical way to approach it:
Early game: Use a compact crop layout with fast-growing plants. Focus on building up your Sheckle balance before investing heavily in expensive equipment.
Mid game: Create a dedicated area for higher-value crops. Improve sprinkler coverage and start using your better equipment where it can benefit the most plants.
Late game: Reserve a section for mutation farming and your most valuable crops. If you have the required pets, you can also dedicate your time to weight-boosting or pet-aging strategies.
Event sessions: Use the Whale setup when you want to focus on event activities and the benefits associated with its weather effects.
The important thing is to avoid trying to make every part of your garden serve the same purpose. A crop area optimized for Sheckles may look very different from a section arranged around pet abilities.
Tips for Getting More Out of Your Garden
Here are a few simple habits that can help you improve your setup:
- Keep valuable crops together: Concentrated crop groups are easier to manage and can make sprinkler placement more efficient.
- Use your best equipment carefully: Prioritize crops that offer enough value to justify stronger sprinkler coverage.
- Remove plants that no longer fit your plan: Replace low-value crops when they occupy space better suited to more profitable options.
- Choose pets based on your goal: Event support, weight boosts, and pet aging require different combinations.
- Avoid spending everything at once: Improve your garden gradually as you earn more Sheckles and obtain better equipment.
- Check pet requirements: Before copying a specialized setup, make sure you have the required pets, abilities, and mutations.
Which Grow a Garden Setup Is Best?
The best setup depends on how you prefer to play.
| Your goal | Recommended setup |
|---|---|
| Earn Sheckles early | Compact crop layout |
| Grow valuable crops | High-density sprinkler layout |
| Get more valuable mutations | Mutation farming zone |
| Farm with less active management | AFK sprinkler layout |
| Support events | Whale pet setup |
| Increase pet weight | KG Boost setup |
| Age pets faster | Level Boost setup |
You can start with a simple crop layout and gradually introduce more specialized strategies as your garden develops. There is no need to unlock every setup before making progress.
Final Thoughts
A well-organized garden can make Grow a Garden easier to manage, but the best arrangement depends on your priorities. Compact crop layouts are useful for building your first Sheckles, while high-density farming and mutation zones can help you make better use of valuable crops later in the game.
Pet combinations add another layer to your strategy. The Whale setup focuses on events and weather effects, the KG Boost setup brings pets together for weight-related boosts, and the Level Boost setup aims to speed up pet aging through cooldown reductions.
Start with the strategy that matches your current goal, then adjust your garden as you unlock better crops, equipment, and pets. This way, you can build a setup that supports your playstyle instead of spending resources on things you do not need yet.